A Guide for How to Winterize Your Boat for Winter Storage
As the boating season draws to a close, a crucial task appears on every owner’s horizon: boat winterization. This isn’t just an end-of-season chore; it’s the single most important act of preventative maintenance you can perform.
With annual U.S. sales of boats and marine products totaling about $57.7 billion in 2023, protecting your investment from harsh winter conditions is very important.
Proper winter storage preparation ensures your vessel weathers the cold safely, preventing costly damage and guaranteeing a swift, trouble-free launch next spring.
Why Proper Boat Winterization Protects Your Investment
Neglecting to winterize your boat is a gamble against nature, and the odds are not in your favor. Water left in the engine block, cooling system, or plumbing can freeze, expand, and lead to cracked engines or burst pipes—repairs that can cost thousands.
This reality is reflected in the growing boat maintenance and repair market, which is expected to reach $23.9 Billion by 2030. Furthermore, with the nautical industry focusing more on sustainability and maintaining existing vessels amidst market shifts, as noted by Oria Marine, preserving your boat’s condition is more important than ever.
A proper winterizing process protects your engine, fuel system, and plumbing system from corrosion, deposits, and freeze damage, saving you money and extending the life of your vessel.
What This Guide Covers: A Step-by-Step Approach for All Boat Types
This guide provides a comprehensive, step-by-step process for a thorough boat winterization. We will cover everything from gathering the right supplies and preparing your engine—whether it’s one of the common outboard engines, powerful inboard engines, or versatile stern drives—to protecting your fuel and water systems. We provide detailed instructions. Always check your owner’s manual for model-specific requirements.
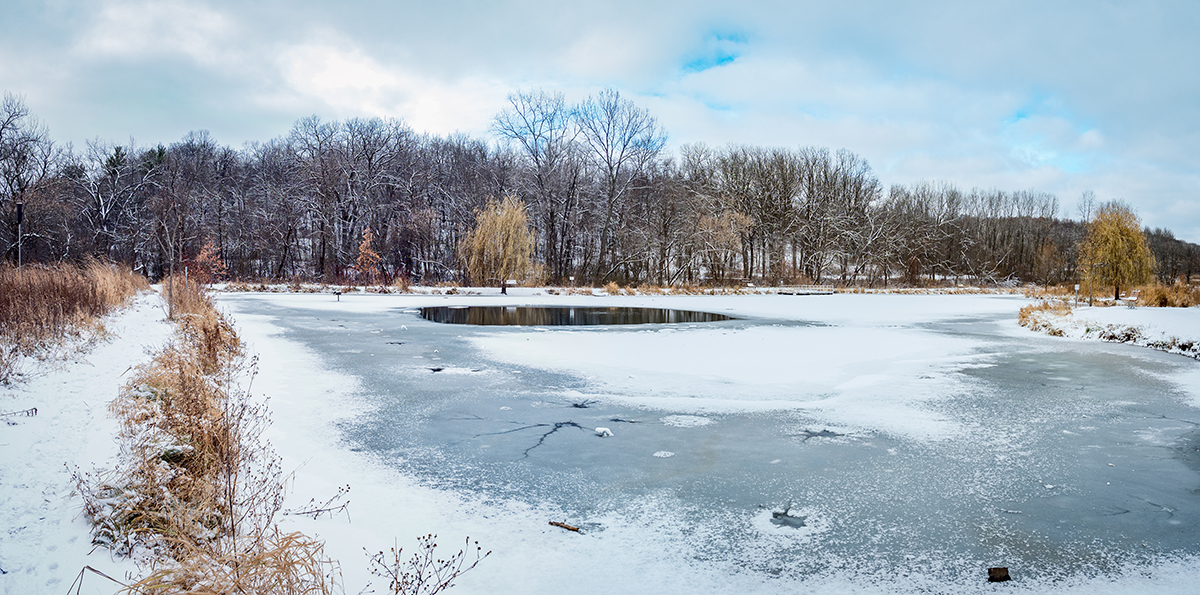
When to Winterize: Understanding Your Climate and Timing
Timing is critical. You should begin the winterizing process when you are certain your boating season is over and before the first hard freeze is forecasted. For boaters in northern climates, this is especially crucial as temperatures can drop unexpectedly. Waiting too long can turn a routine maintenance task into an emergency repair. Plan to have your boat fully prepared for winter storage at least a week before consistent freezing temperatures are expected.
Section 1: Gather Your Supplies & Prepare for Success
Before you begin, a well-organized toolkit will make the entire process smoother and more efficient. Having everything on hand prevents delays and ensures you don’t miss a critical step. Preparation is the foundation of a successful boat winterization.
The Essential Winterization Toolkit: A Comprehensive List
Your toolkit should be a mix of specific marine products and general-purpose tools. Always start by reading your boat’s owner’s manual for any unique requirements or recommended products.
Essential Fluids and Chemicals:
- Marine-Specific Fuel Stabilizer Additive: A quality fuel treatment to prevent degradation and protect the fuel system.
- Engine Oil & Oil Filter: For the critical end-of-season oil change.
- Lower-Unit Lube / Gear Lube: Essential for stern drives and outboard engines.
- Engine Fogging Oil: To coat internal engine components and prevent rust.
- Marine & RV Antifreeze: Specifically non-toxic propylene glycol antifreeze for engine cooling systems and the plumbing system. Do not use automotive antifreeze, as it is toxic to aquatic life.
- Grease: Marine-grade grease for fittings and propellers.
- Cleaners & Waxes: For cleaning the hull, deck, and interior to prevent mold and mildew.
Tools and Equipment:
- Socket/Wrench Set
- Screwdrivers
- Oil Filter Wrench
- Gear Lube Pump
- Flush Muffs (“Ears”)
- Hoses & Funnels
- Rags & Absorbent Pads
- Wire Brush: For cleaning battery terminals.
- Trickle Charger or Battery Tender: To maintain battery health.
Pre-Winterization Checks: What to Inspect Before You Start
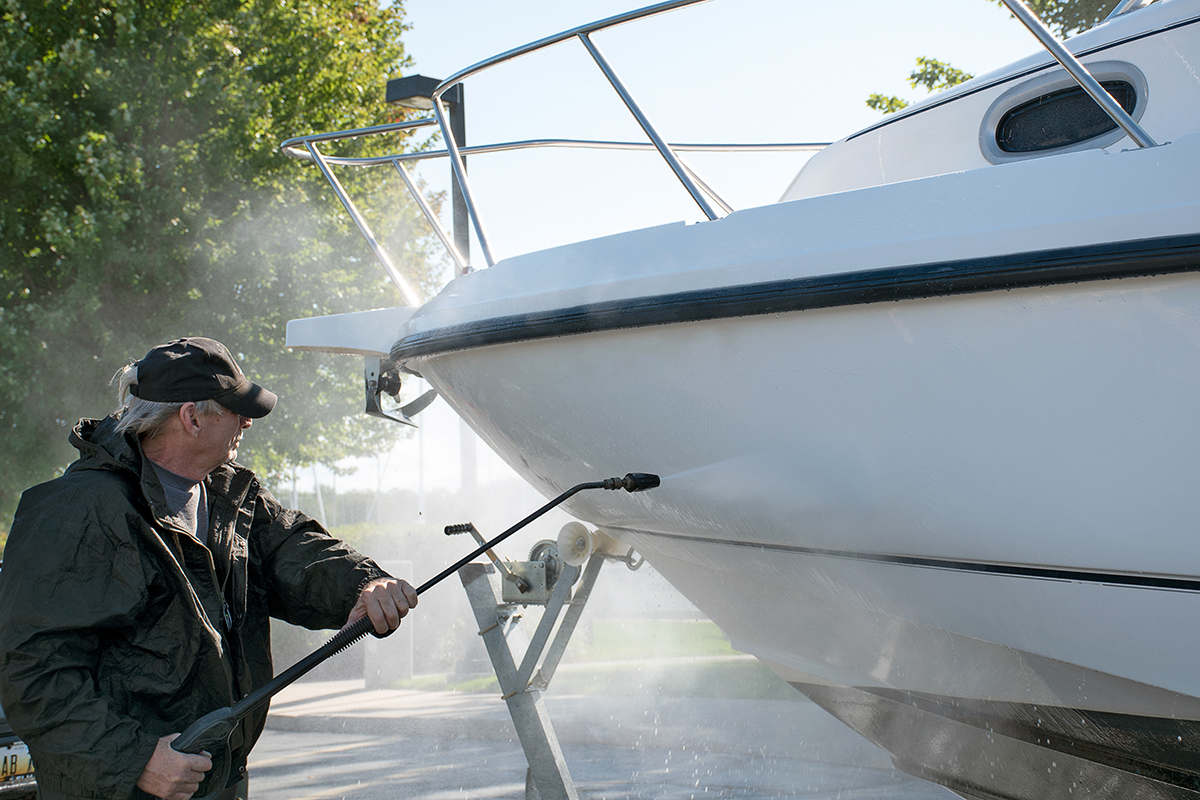
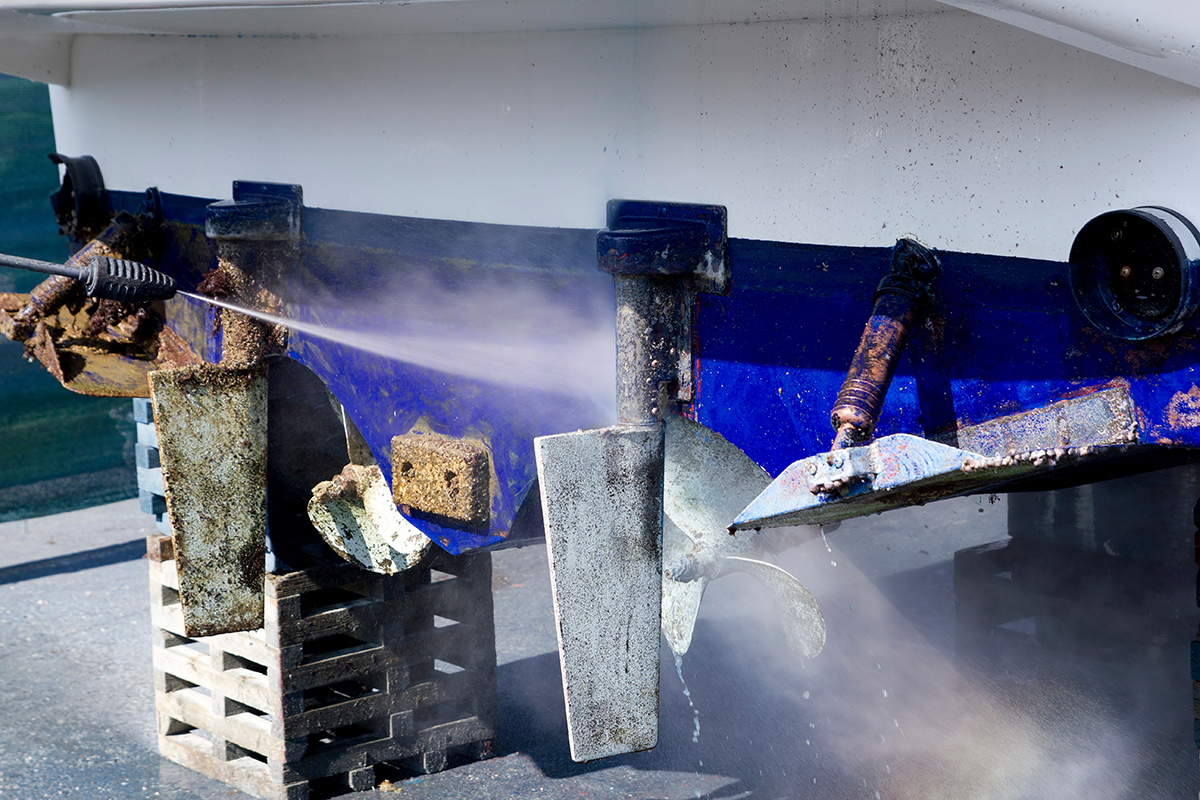
Before diving into mechanical tasks, perform a thorough inspection. Look for hull cracks, inspect propellers, and test electrical components. Addressing minor repairs now is far easier than discovering them in the spring. Give your boat a complete cleaning inside and out to prevent mold and mildew from taking hold. This is also the time to decide on your boat storage plan. Review your storage options, which can range from a marina slip or wet slips (requiring in-water winterization) to various forms of dry storage like dry stack storage. If using a professional service, inquire about their winter packages. Protecting your boat from the elements is key, so choose a high-quality boat cover or consider professional shrink wrapping for maximum protection against water intrusion.
Section 2: Engine Winterization – The Heart of Your Boat’s Survival
The engine is the most expensive and complex component of your boat. Protecting it from freezing temperatures and internal corrosion is the most critical part of the winterizing process. Proper engine winterization is your best defense against catastrophic failure.
General Engine Winterization Principles (Applies to All Types)
Regardless of your engine type, the core goals are the same: remove corrosive contaminants, protect internal parts from rust, and ensure no water remains to freeze and expand. Start by warming the engine to operating temperature. This lets the old oil drain more completely. The oil takes suspended impurities with it.
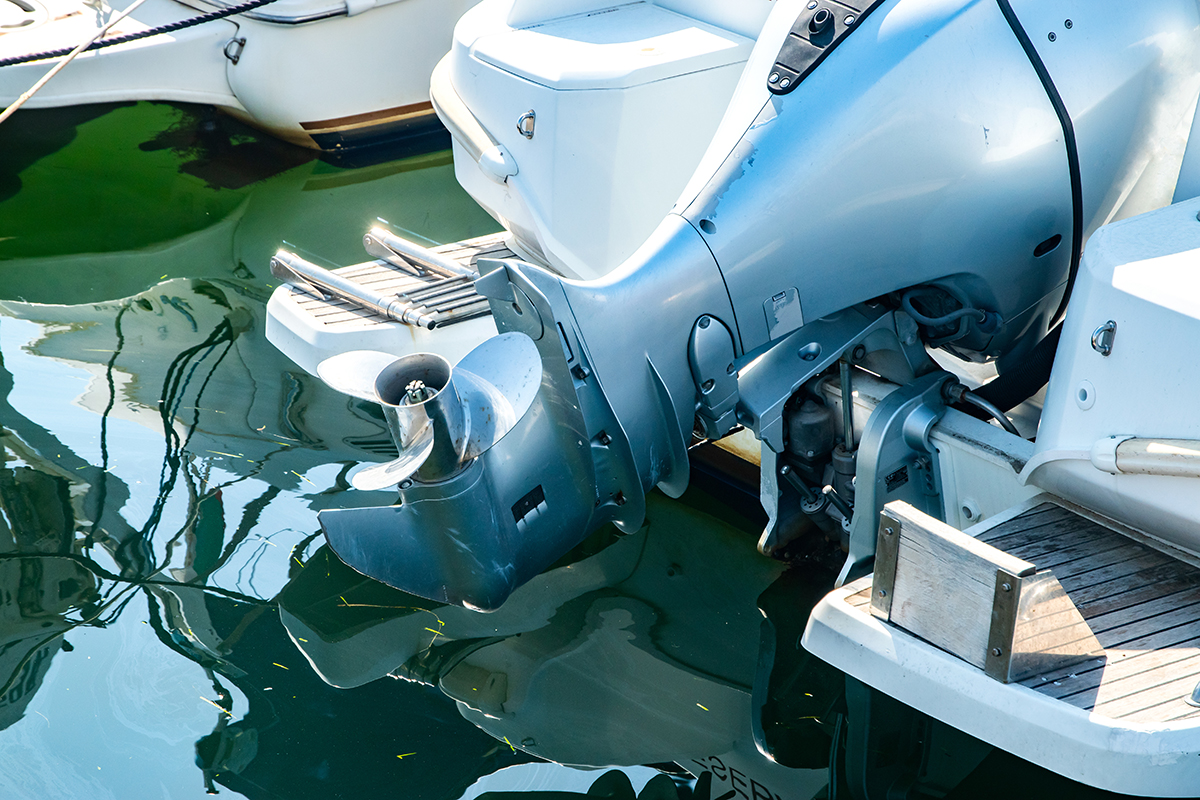
Outboard Engines: Step-by-Step Winterization
- Fuel Stabilization: Add the correct amount of fuel treatment to your fuel tank and run the engine for 10-15 minutes on flush muffs to ensure the stabilized fuel circulates through the entire fuel system.
- Fog the Engine: While the engine is still running, spray fogging oil into the air intakes until the engine stalls. This coats internal surfaces with a protective layer of oil.
- Change Gear Lube: Place a drain pan under the lower unit. Remove the upper and lower drain screws and let the gear lube drain completely. A milky appearance indicates water intrusion and a potential seal failure that needs immediate attention. Refill with fresh lower-unit lube from the bottom hole until it seeps out the top, then replace both screws.
- Drain Cooling System: Once the engine is off, trim it to the full down position to allow all water to drain from the cooling system. This is a vital step to prevent freezing.
Inboard Engines: Comprehensive Winterization
- Warm the Engine & Change Oil: After reaching operating temperature, pump out the old oil. Replace the oil filter, applying a light coat of new oil to the gasket. Refill with the manufacturer-recommended oil.
- Flush and Drain Cooling System: For raw-water cooled engines, flush the system with fresh water. Then, drain the entire system by opening all petcocks and removing drain plugs on the engine block and manifolds. Don’t forget to check the exhaust ports.
- Circulate Antifreeze: Close all drains. Use a 5-gallon bucket and a hose connected to the main water intake to run Marine & RV Antifreeze through the engine cooling systems. Start the engine and let it draw in the antifreeze until you see pink fluid exiting the exhaust. This ensures complete protection. It’s also a good time to inspect the water pump impeller and replace it if it shows signs of wear.
Stern Drives (Inboard/Outboard): Specific Winterization Steps
Stern drives require a combination of inboard and outboard winterization procedures.
- Engine Winterization: Follow the complete process for inboard engines, including the oil change, fuel stabilization, and circulating antifreeze through the cooling system.
- Outdrive Maintenance: Inspect the outdrive, especially the rubber bellows, for cracks. Clean off any marine growth.
- Change Gear Lube: As with outboard engines, drain, inspect, and refill the gear lube in the outdrive.
- Storage Position: Store the outdrive in the full down position. This prevents water from collecting in the housing and keeps the bellows from developing a permanent crease.
Section 3: Fuel System Protection – Preventing Corrosion and Deposits
Modern fuels, especially those with ethanol, can cause significant problems over a long winter storage period. Protecting your fuel system is essential for a quick, reliable start in the spring.
The Importance of Fuel Stabilization: Combating Ethanol and Oxidation
Ethanol attracts water, which can lead to phase separation where a corrosive water-ethanol mixture sinks to the bottom of your fuel tank. Fuel also oxidizes, creating gums that clog lines, filters, and injectors. A quality marine-specific fuel stabilizer additive prevents both of these destructive processes.
Filling the Fuel Tank: Full vs. Partially Full (and why)
For winter storage, it is best to fill the fuel tank to about 90% capacity. A full tank leaves less room for air, which minimizes condensation from forming on the tank walls and contaminating your fuel. After filling, add the stabilizer and run the engine for a few minutes to circulate the treated fuel.
Fuel Filter and Fuel/Water Separator: Inspection and Replacement
The end of the season is the perfect time to replace your fuel filter and drain or replace your fuel/water separator. This removes any trapped water or debris before storage. Starting the spring with a fresh filter is cheap insurance against fuel delivery problems that could derail your first trip.
Draining the Carburetor (if applicable)
For carbureted engines, it’s good practice to drain the carburetor float bowls after running stabilized fuel through the engine. This removes the last bit of fuel that could evaporate and leave varnish deposits, which can clog the tiny jets and passages critical for engine performance.
Section 4: Water and Plumbing Systems – Averting Frozen Catastrophe
Any water left in your boat’s plumbing system—tanks, pipes, pumps, or heads—is a ticking time bomb in freezing weather. Draining and protecting these systems is non-negotiable.
Draining All Freshwater Systems
Start by opening all faucets and turning on the freshwater pump to drain the hot water heater and empty the tank completely. Use low-point drains if available. Ensure all water circulation is stopped and every drop of water is out of the lines. Don’t forget to remove the transom drain plug once the boat is out of the water.
Treating the Plumbing System with Antifreeze
Once drained, the plumbing system must be filled with non-toxic Marine & RV Antifreeze. You can use a winterizing kit to pump antifreeze directly into the system. Or, pour antifreeze into the empty freshwater tank. Then run each faucet until the pink fluid appears. This protects all pipes, pumps, and fixtures from freezing.
Head (Toilet) and Holding Tank Winterization
After pumping out the holding tank at an approved facility, add antifreeze to the empty tank to protect the discharge plumbing. Pour antifreeze into the toilet bowl and flush it through the system to winterize the intake and discharge lines, ensuring all components are protected.
Bilge Maintenance: Ensuring a Dry Start to Spring
A clean, dry bilge is crucial. Pump out all water and scrub it with a cleaner to remove oil and grime. This prevents odors and mold and mildew. Check that the bilge pump and its float switch are functioning correctly, though you should not rely on them during storage when batteries are disconnected.
Preventing Mold and Mildew in Water Systems
Even after draining, residual moisture can promote mold and mildew. Running antifreeze through the systems helps. Also, prop open any storage compartments, refrigerators, and freezers. This allows air to circulate during winter storage. Use moisture-absorbing products in enclosed cabin spaces.
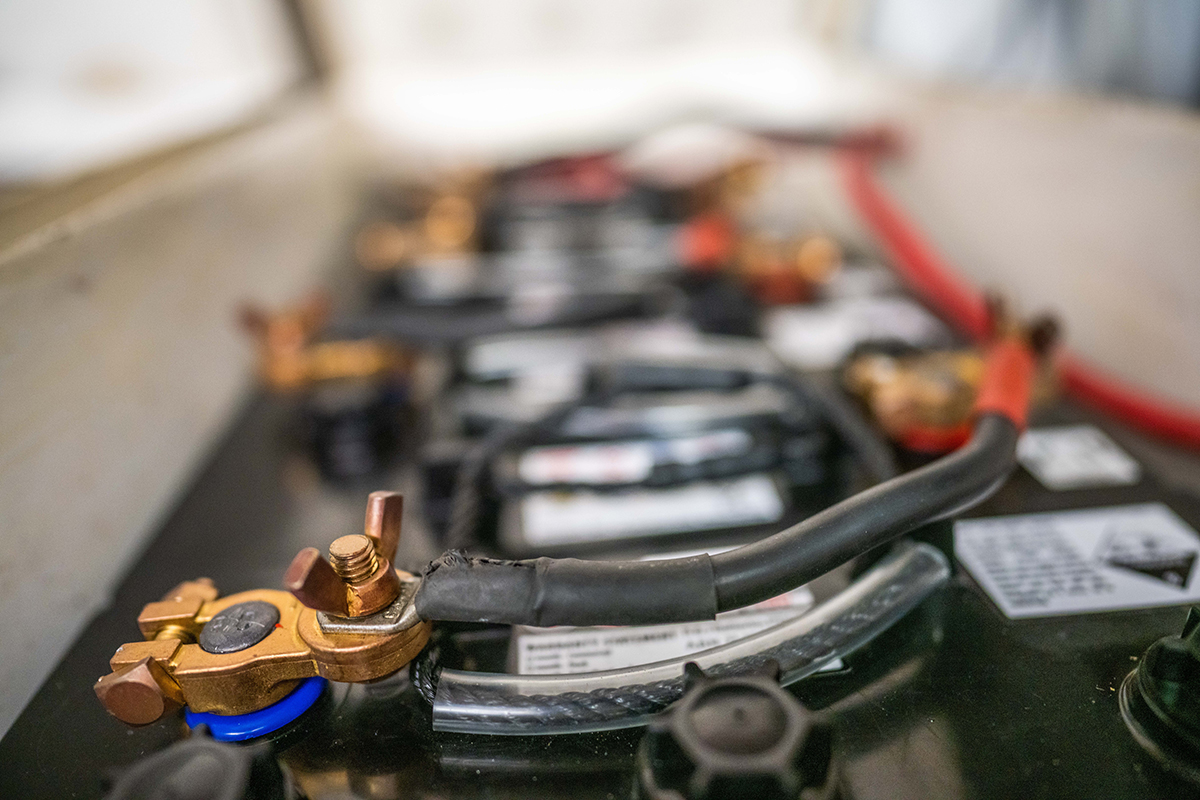
Section 5: Battery Care and Electrical Systems
Winter is tough on batteries. Cold temperatures can drain their charge, and a fully discharged battery can freeze, crack, and be completely destroyed. Proper care of your electrical system is essential for a successful spring launch.
Removing and Storing Your Batteries
It is highly recommended to remove batteries from the boat for winter storage. Clean the battery terminals and cable ends with a wire brush to remove corrosion. Store the batteries in a cool, dry place off concrete floors, such as on a wooden shelf in a garage or basement. This applies to standard lead-acid batteries as well as a lithium-ion battery or NiMH batteries, though always check the manufacturer’s specific storage recommendations.
Maintaining Battery Charge During Storage
A fully charged battery will not freeze. Throughout the winter, check the battery’s charge level monthly. The best solution is to connect the stored batteries to a smart trickle charger or battery tender. This device monitors the charge and delivers power only when needed. It prevents overcharging.
Disconnecting Other Electrical Components
To prevent any drain on the system, disconnect other onboard electrical components. This also protects sensitive electronics from cold and moisture. Consider removing expensive items like chartplotters, fish finders, or even your portable Bluetooth speaker and storing them at home. Don’t forget to check your safety equipment and bring flares or fire extinguishers indoors if their lifespan could be affected by extreme cold.
Conclusion
Proper boat winterization is not just a suggestion. It is a basic responsibility of boat ownership. It protects your boat and your money. Follow these steps carefully. Prepare your engine and fuel system. Safeguard your plumbing and batteries. This creates a shield against harsh winter damage. This process is an investment in your boat’s longevity and ensures that when warm weather returns, you’re ready for a new season of enjoyment.
For those who prefer professional assistance, many marinas like Margaritaville at Lanier Islands Marina offer comprehensive winter packages. You can get a quote or contact members to discuss your specific boat storage needs. If you’re looking to build your skills, consider a boating education course to become more confident in your maintenance abilities. When spring arrives, perform a pre-launch check and plan for a short shakedown cruise to ensure all systems are running smoothly. Take the time to do it right, and your boat will be ready for adventure when you are.