After months in winter storage, most ATV batteries fail their first spring startup for one of three reasons: corroded terminals, a deeply discharged cell, or physical damage like swelling or cracks.
A 20-minute inspect-clean-test-charge routine catches all three before they ruin opening day on the trail.
The crisp air signals a welcome change, and for ATV enthusiasts it means the long-awaited return to the trail. After months of winter storage, the urge to hit the throttle is almost overwhelming.
Until the moment you turn the key and hear nothing but a dead click. A dormant battery is the silent saboteur of your first spring adventure, and the fix is almost always preventable.
The Role of Your ATV’s Battery
Your ATV’s battery is more than just a component. It’s the powerhouse that breathes life into your entire vehicle, responsible for initiating the combustion process by sending a surge of power to the starter motor and turning the engine over.
Beyond starting, the battery provides the electrical current for ignition, lights, the display panel, and any accessories you’ve fitted, from winches to GPS units. Without a healthy battery, even the most capable ATV is useless.
Why Spring Readiness Matters
Winter storage, while necessary, is a long stretch of inactivity that wears on a battery. Lead-acid and AGM batteries naturally self-discharge whenever they sit unused.
Polaris’s official maintenance guidance recommends keeping a battery on a trickle charger or topping it off monthly precisely to counter this drain. [1]
If left unchecked, a battery that seemed healthy last fall can be completely depleted by spring.
Spring battery care does two things. It gets you riding sooner this season, and it adds years to the battery’s service life so you replace it less often.
Step-by-Step Spring Battery Inspection and Cleaning
Before attempting to start your ATV or connecting a charger, inspect and clean the battery first. This clears the electrical path and surfaces any damage that could turn into a roadside breakdown.
Safety First: Preparing to Work on Your Powersports Vehicle
Park your ATV on a stable, level surface. If you’re working in a garage, open a door or window for ventilation. Put on safety glasses and gloves before you start.
Locating and Accessing Your ATV Battery
The battery on most ATVs is located under the seat, in a compartment behind a plastic panel, or sometimes in the front.
Consult your owner’s manual for the exact location and any specific instructions for accessing it, which may involve removing seats, body panels, or racks.
Thorough Visual Inspection for Damage
Once accessed, carefully inspect the battery case for any signs of damage. Look for:
- Cracks or punctures: can lead to leaks and electrolyte loss.
- Swelling or bulging: often indicates internal damage from overcharging or freezing.
- Corrosion: white or greenish powdery buildup on the terminals.
- Leaks: any liquid seeping from the case or around the terminals.
If you find significant damage or leaks, the battery needs to be replaced. No amount of cleaning will save it.
Cleaning Battery Terminals and Cables
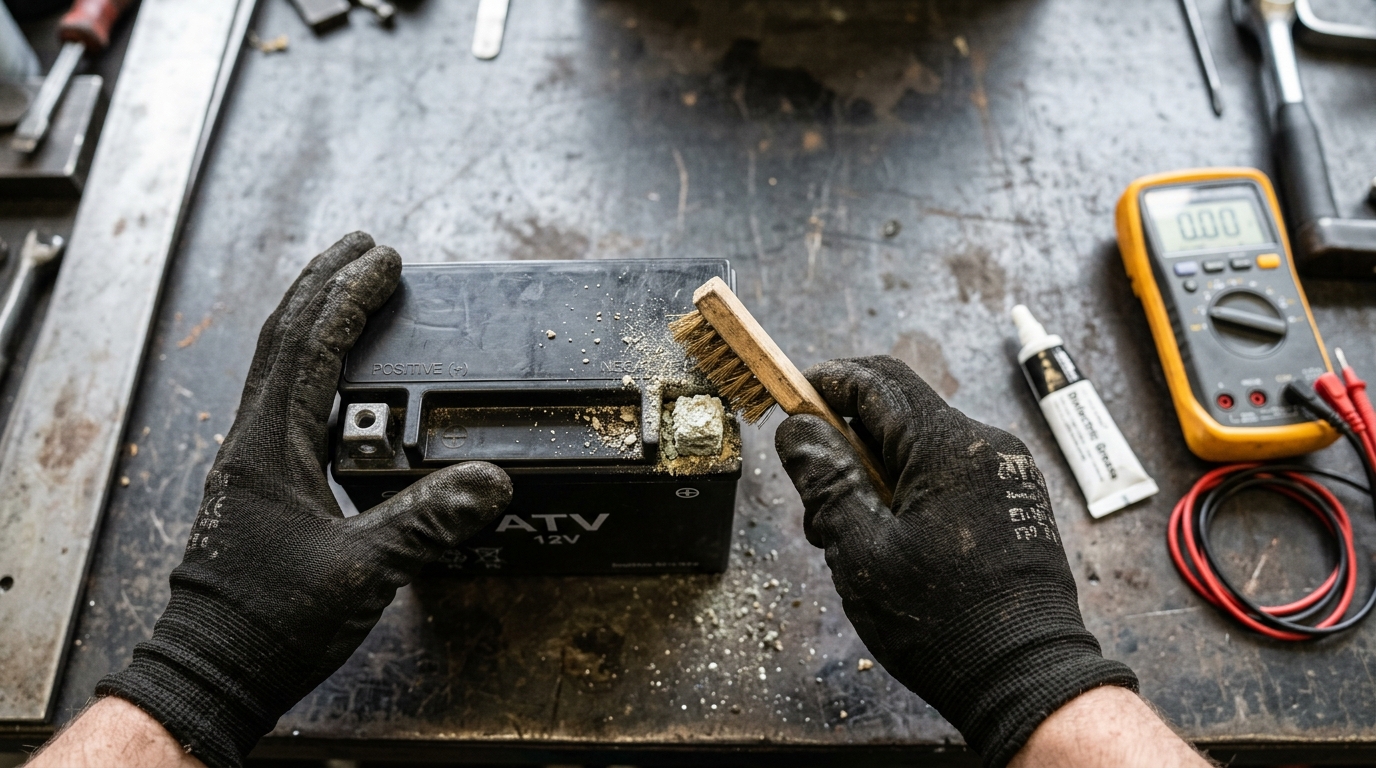
Corrosion on battery terminals and cable connectors impedes electrical flow, hindering starting and charging.
- Disconnect cables if you haven’t already (negative first).
- Scrub the terminals with a wire brush and battery terminal cleaner or a baking soda and water mixture, until you see bright, shiny metal.
- Rinse and dry with clean water (avoid getting excessive water inside the battery if it’s not sealed) and a clean rag.
- Apply protectant: a thin layer of dielectric grease on both the posts and the inside of the cable connectors creates a barrier against moisture and dirt.
Securing Electrical Connections
Reconnect the cables in reverse order: positive (red) first, then negative (black). Make sure the clamps are snug.
A loose connection causes intermittent power issues that mimic a dead battery, and they’re maddening to diagnose. If you can wiggle the clamp by hand, it’s not tight enough.
Testing Your ATV Battery’s Current Health
After cleaning, test the battery’s charge level and overall health to determine if it’s ready for the season or needs attention.
Using a Voltmeter for Accurate Readings
A multimeter is your primary diagnostic tool. Connect the red lead to the positive (+) terminal and the black lead to the negative (−) terminal.
Make sure the ignition is off, and the battery hasn’t been recently charged or discharged for at least a few hours. Otherwise, you’ll get a misleadingly high reading.
These are resting voltages. If your ATV has a charging system issue, the voltage may read higher than expected when the engine is running, which can mask the underlying problem. [2]
Performing a Load Test (Optional, for Advanced Diagnosis)
A load test is a more definitive way to assess battery health. It measures the battery’s ability to deliver power under simulated operating conditions.
- Connect a load tester to the battery terminals.
- Apply load per the tester’s instructions, usually half the battery’s rated amperage for 10–15 seconds.
- Read the voltage under load. A healthy battery should hold above 9.6V. A significant drop below that means the battery is weak and needs replacement, even if the resting voltage looked fine. [3]
Proper Charging Techniques for Your ATV’s Battery
If your battery’s voltage is low or it failed a load test, charge it properly. The right charger and technique stretch battery life and get it ready for your next ride.
Choosing the Right Battery Charger for Your ATV
Avoid using high-amperage automotive chargers: they can overcharge and damage smaller ATV batteries. Always confirm the charger is compatible with your battery type.
Safely Connecting Your Charger
- Disconnect the battery from the ATV’s electrical system.
- Connect the charger’s positive (+) lead to the positive terminal.
- Connect the negative (−) lead to the negative terminal.
- Make sure the clamps are firmly attached.
- Plug the charger into a grounded AC outlet.
The Charging Process: Duration and Monitoring
Follow the charger manufacturer’s instructions for duration. Smart chargers will indicate when the battery is fully charged. For other chargers, monitor the voltage. A fully charged battery should read approximately 12.8 to 13.0 volts.
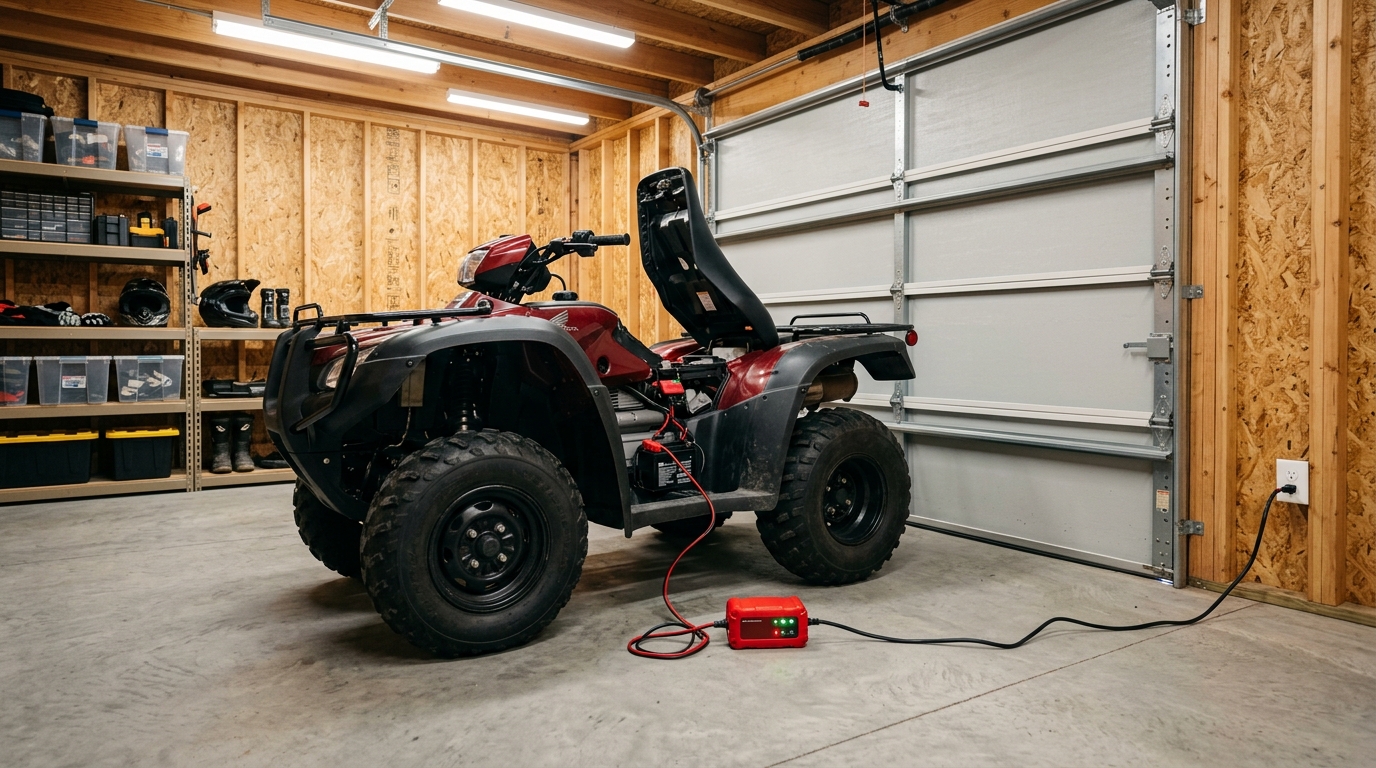
Avoid leaving a battery on a basic charger indefinitely; overcharging causes damage. A smart charger or battery maintainer is the best option for keeping it topped up during inactivity.
Can-Am’s official storage guide recommends the same approach: connect a trickle charger during long off-season layups to prevent the deep discharge that ruins batteries before spring. [4]
What to Do If Your Battery Won’t Hold a Charge
If your battery repeatedly fails to hold a charge, even after proper charging and testing, it’s likely at the end of its service life. Internal sulfation, damaged plates, or a failing internal cell can prevent it from retaining power.
The most sensible course is replacement. Buy a new battery that meets or exceeds your ATV manufacturer’s specs, paying attention to the CCA (Cold Cranking Amps) rating and physical size.
What we see at Due North Storage
When customers pick up ATVs in spring, the most common complaint we hear is the same one every year: a dead battery on the first start attempt.
Nine times out of ten, the unit was either left disconnected from a maintainer all winter or stored somewhere without an outlet.
The fix is almost always cheaper than a new battery, and it starts in October, not April.
Skip the spring battery hassle next year.
Every Due North Storage unit includes electricity. Keep a trickle charger on your ATV all winter and start next spring with a fully charged battery, every time.
Maintaining Battery Longevity Throughout the Riding Season
Battery care doesn’t end with spring preparation. A worn-out battery turns into mid-trail delays, so good riding-season habits add years of reliable starts.
Regular Visual Checks Before Every Ride
Before heading out, take a few moments to visually inspect the battery. Look for loose connections, corrosion buildup on the terminals, or damage to the casing. It takes 30 seconds and saves whole days.
Keeping Terminals Clean and Protected from Dirt and Mud
ATVs are subjected to harsh environments: mud, dirt, and dust. These contaminants work their way into electrical connections, causing corrosion and poor conductivity.
After a ride through particularly dirty terrain, wipe down the battery area and inspect the terminals. Reapply dielectric grease periodically if you notice any uneven wear.
Keeping the terminals clean matters as much as tire pressure or oil levels.
Avoiding Deep Discharges
Deep discharges, when a battery is drained to very low voltage, are hard on lead-acid batteries and especially AGM types. Each deep discharge cycle causes irreversible damage to the plates, reducing capacity and overall lifespan.
Avoid letting accessories run with the engine off for extended periods. If you use winches or other high-draw accessories, run the engine simultaneously so the charging system can keep up.
Final Thoughts
A few minutes of battery care up front means your ATV is ready when you are.
A well-maintained battery is just one part of a fully prepared vehicle, so while you’re at it, also check brake fluids, oil levels, filters, tire pressure, and fuel stability.
The same prep logic applies across the rest of your toys, especially the off-season machines that are easy to overlook, like the storage mistakes that lead to mold and mildew in stored snowmobiles.
Follow these practices and your ATV will be eagerly waiting for whatever adventures spring has in store.
Frequently Asked Questions
What voltage should a healthy ATV battery read?
A fully charged ATV battery should read 12.8 volts or higher when it has been sitting and is not being charged or used. Around 12.6V means it is only partially charged and could use a top-off.
Below 12.5V means it needs charging right away, and anything under 12.4V usually means the battery is damaged and likely needs to be replaced.
Always test with the ignition off and after the battery has rested for at least a few hours.
Can I use a car battery charger on my ATV battery?
You shouldn’t. Car chargers push too many amps for a smaller ATV battery, which can overheat it and cause permanent damage.
Use a smart charger or trickle charger built for powersports batteries instead. These adjust the current to match what your battery actually needs, and most can stay connected for months without overcharging.
Why does my ATV battery die over winter?
Lead-acid and AGM batteries slowly lose charge on their own, even when they are disconnected and not in use. Cold temperatures speed up that process.
Over a few months of storage, a battery that was healthy in October can drop low enough that it won’t start your ATV in April. A trickle charger keeps it topped off so it is ready when you are.
Should I disconnect my ATV battery for winter storage?
Disconnecting the negative cable helps if you have no way to plug in a maintainer, because it stops slow drains from the ATV’s electronics. But even disconnected, the battery will still self-discharge over time.
The better option is to leave it connected to a trickle charger or smart maintainer all winter so it stays at full charge and is ready to start in spring.
Is it okay to leave a battery maintainer on all the time?
Yes, as long as it is a true smart maintainer or trickle charger built for long-term use. These chargers shut off or switch to a very low float current once the battery is full, so they will not overcharge it.
Don’t leave a basic high-amp automotive charger connected, because it can boil off electrolyte and ruin the battery.
How long does it take to charge an ATV battery?
It depends on how low the battery is and the charger’s output. A smart charger usually brings a moderately discharged battery back to full in 4 to 8 hours, and it will tell you when it is done.
A trickle charger can take 24 hours or more, but it can stay connected indefinitely without harm.
Avoid forcing a fast charge: slower charging is easier on the battery and extends its life.
Store your ATV with us next winter.
Indoor units up to 14×40 with electricity included, just off Highway 10 in the St. Cloud area. Avoid the dead-battery surprise next April.
Sources:
[1] Polaris. Battery Charging and Maintenance Tips for Polaris Off-Road Vehicles. Retrieved 2026-05-05.
[2] Chengjoseph. (2026, January 15). How to charge ATV battery safely: Expert tips to maximize lifespan. TYCORUN.
[3] SuperATV. UTV and ATV Slow Cranking, Let’s Troubleshoot It.
[4] Can-Am (BRP). How to Store an ATV or SxS for Winter. Retrieved 2026-05-05.